Managing Pre-Order
Product: Muvi One (Classic)How to Add a Pre-Order Category
Adding Multiple Pre-Order Categories
How to Delete a Pre-Order Category
How a User Will Pre-Order Content
Introduction
With the Muvi Pre-Order feature, you can allow your users to buy content in advance at a discounted price. “Pre-Order” only works for content without video. “Pre-Order” will be replaced with the “Watch Now” button, when the video is uploaded or live streaming for the content is available. All users who have purchased will be notified automatically by email when the video is uploaded to the content. After the end of the offer period, the content will work as PPV content, if PPV is enabled. If PPV is not enabled, the content will be available as free content for all users. The Content will not be available for users if the video is not uploaded after the end of the offer period. You can add different Pre-Order categories, edit a category or delete a category.
Note:
- Pre-Order is only applicable for VOD (Video On Demand) Single Part and Live Streaming content only.
- First, you need to integrate Payment Gateway (Monetization -> Payment Gateway) to enable Pre-Order.
- Once you upload a video for Pre-Order content, it will become normal content. Users can watch this content by purchasing a subscription or by paying a one-time fee (i.e. PPV)
Enabling Pre-Order
Before creating the Pre-Order category, first, you need to enable this feature in your CMS.
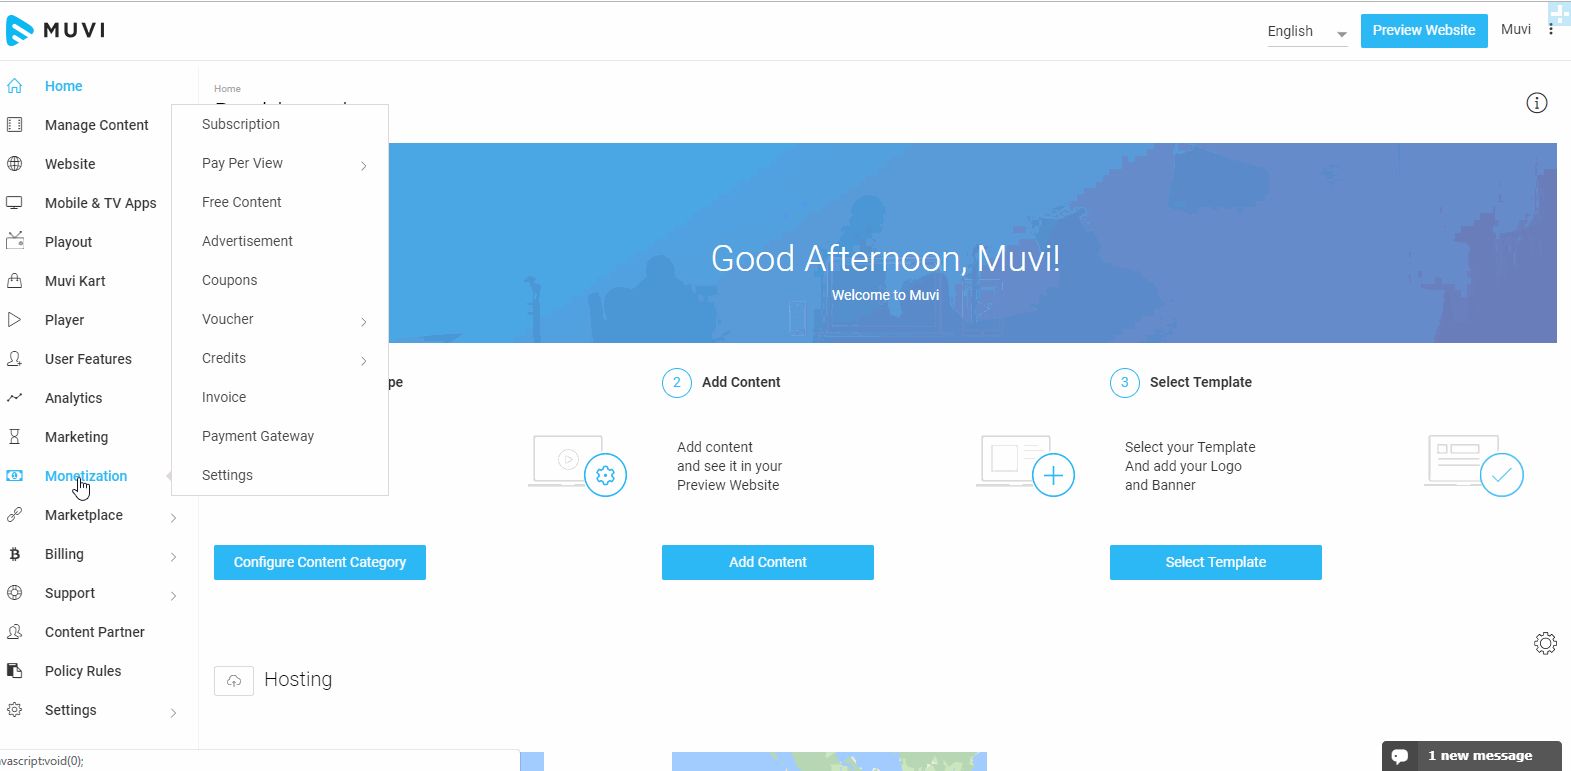
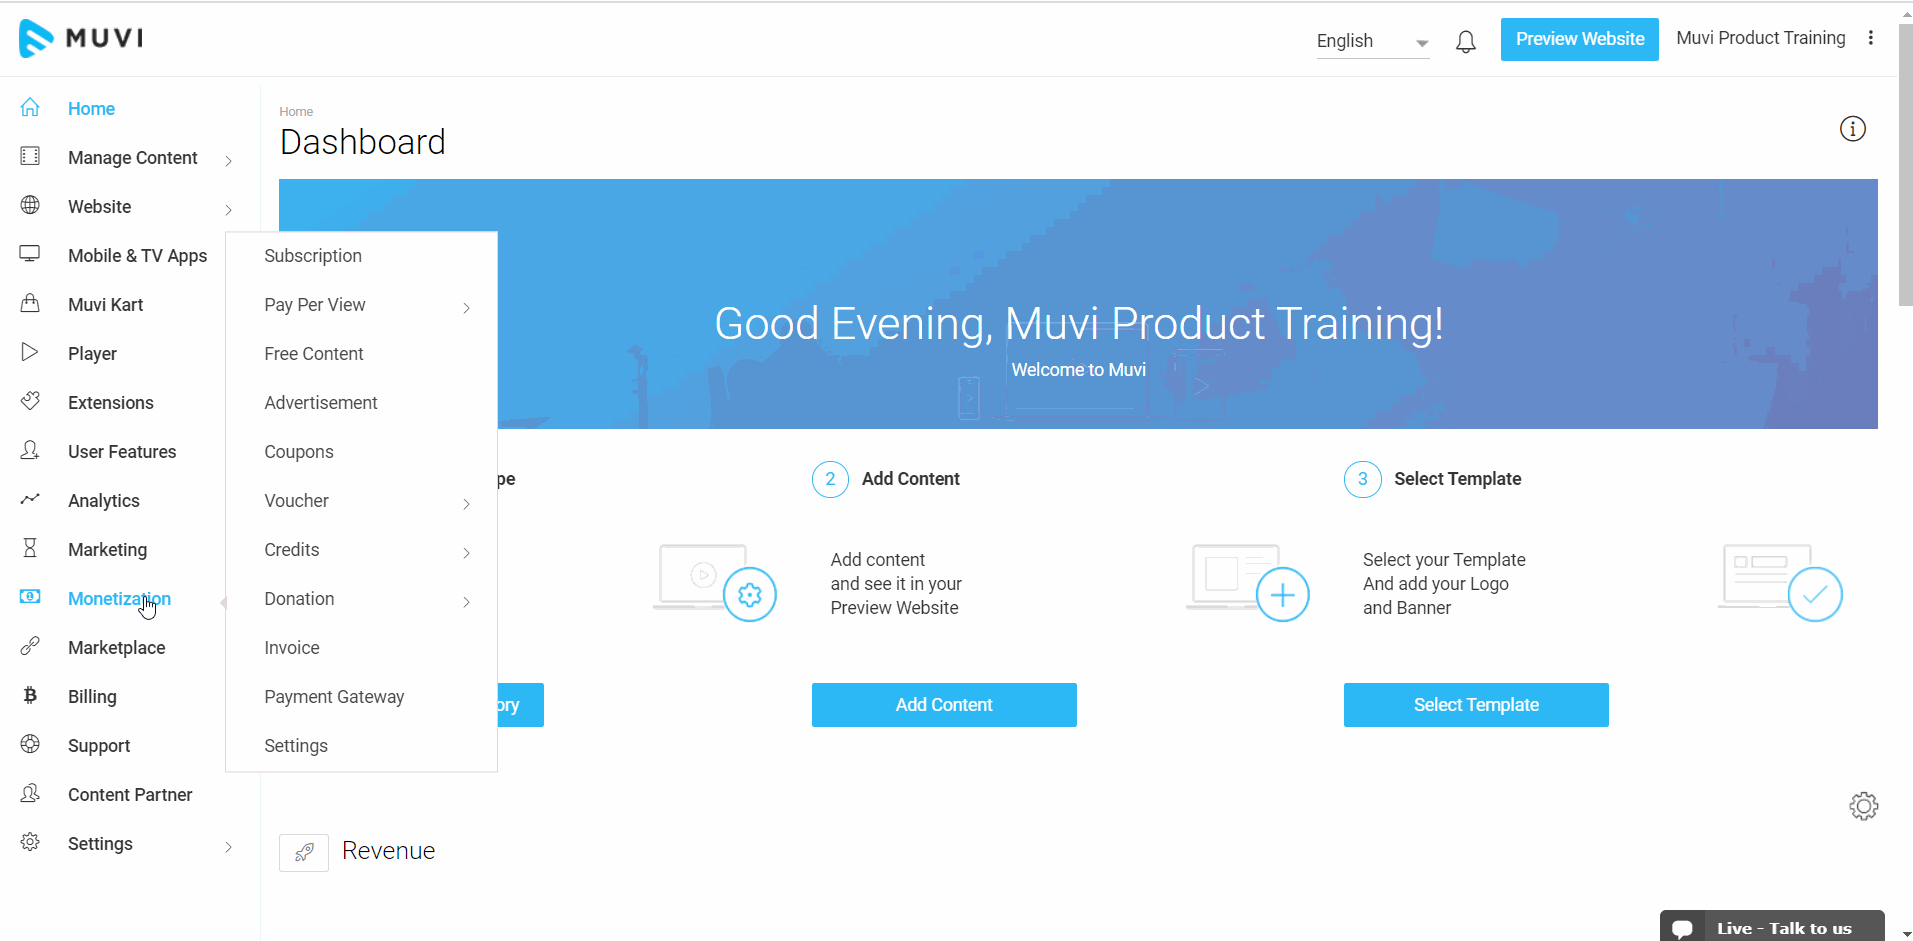
- To enable Pre-Order, go to “Monetization” --> “Settings” in your CMS.
- Under “Monetization Model” select the check box “Pre-Order”
- Finally, click on “Update”
Pre-Order will be enabled for your store. Once Pre-Order is enabled, it will be displayed under the Monetization menu. ((Monetization -->Pay Per View-->Pre-Order)
How to Add a Pre-Order Category
To add a new Pre-Order category, navigate to “Monetization” --> “Pay Per View” -->“Pre-Order” in the CMS.
- Click on “Add Category”.
- A new window will open. Type a title of the category, mention the price for “Non-Subscribers” and “Subscribers”. (Click on “Add more price for the specific country” if you want to add multiple currencies). (While adding currency for another country, you need to convert your default currency to that specific country's currency as currencies are not converted automatically. For example, if your default currency is US Dollar and you are adding currency for India, then you need to convert the value of the US Dollar to Indian Rupees. If you have set $1.00 for content then while adding INR you need to type Rs. 71.55 in the corresponding field.). You can also set different values for different countries. Like $1.00 for US and Rs. 500 for India and so on. Also, users in a specific country will see the content price in their currency when they click on content to purchase it and will be charged in their currency. (For example, a user in Japan will see the price of the content in Yen even though default currency is set in US Dollar)
- Type the Content name that you want to add in the Pre-Order category. (You can add multiple VOD and Live Streaming content).
- Mention the "From Date" and "From Time" in UTC and then mention the "To Date" and "To Time" in UTC till which the offer is valid.
- In the Description section, mention that when the Content will be available for viewing.
- Finally, click on “Add” to add the category.
Adding Multiple Pre-Order Categories
You can add multiple Pre-Order categories for the same content. For example, if you have already added a category for a movie, then you can create another Pre-Order category for the same movie. You can give a different name for the category, add different prices for subscribers and non-subscribers, add different currency and validity periods. By adding multiple categories for the same content you can allow your users to select the same Pre-Order content with multiple pricing and validity options.
- To add multiple categories, go to “Monetization” --> “Pay Per View” -->“Pre-Order” in your CMS.
- Click on “Add Category”
- A new window will open. Type a different title for the category
- Mention different price for “Non-Subscribers” and “Subscribers”. (Click on “Add more price for specific country” if you want to add multiple currencies)
- Type the Content name that you have already added in the Pre-Order category.
- Mention the date till which the offer is valid for
- In the Description section, mention that when the Content will be available for viewing
- Finally, click on “Add” to add the category
A new category for the same content will be added. Users can see multiple categories of Pre-Order content on your website and purchase their suitable category from the list.
Editing a Pre-Order Category
You can edit a specific Pre-Order category. To edit a category, go to “Monetization” --> “Pay Per View” -->“Pre-Order” in your CMS.
- Click on the “Edit” icon on the extreme right-hand side of a category.
- Make the necessary changes and then click on “Update” to save the changes you have made.
How to Delete a Pre-Order Category
Whenever you want you can delete a specific Pre-Order category. To delete a category, go to “Monetization” --> “Pay Per View” -->“Pre-Order” in your CMS.
- Click on “Delete” on the extreme right-hand side of the category
- When asked for confirmation, click on “Yes”. The category will be deleted.

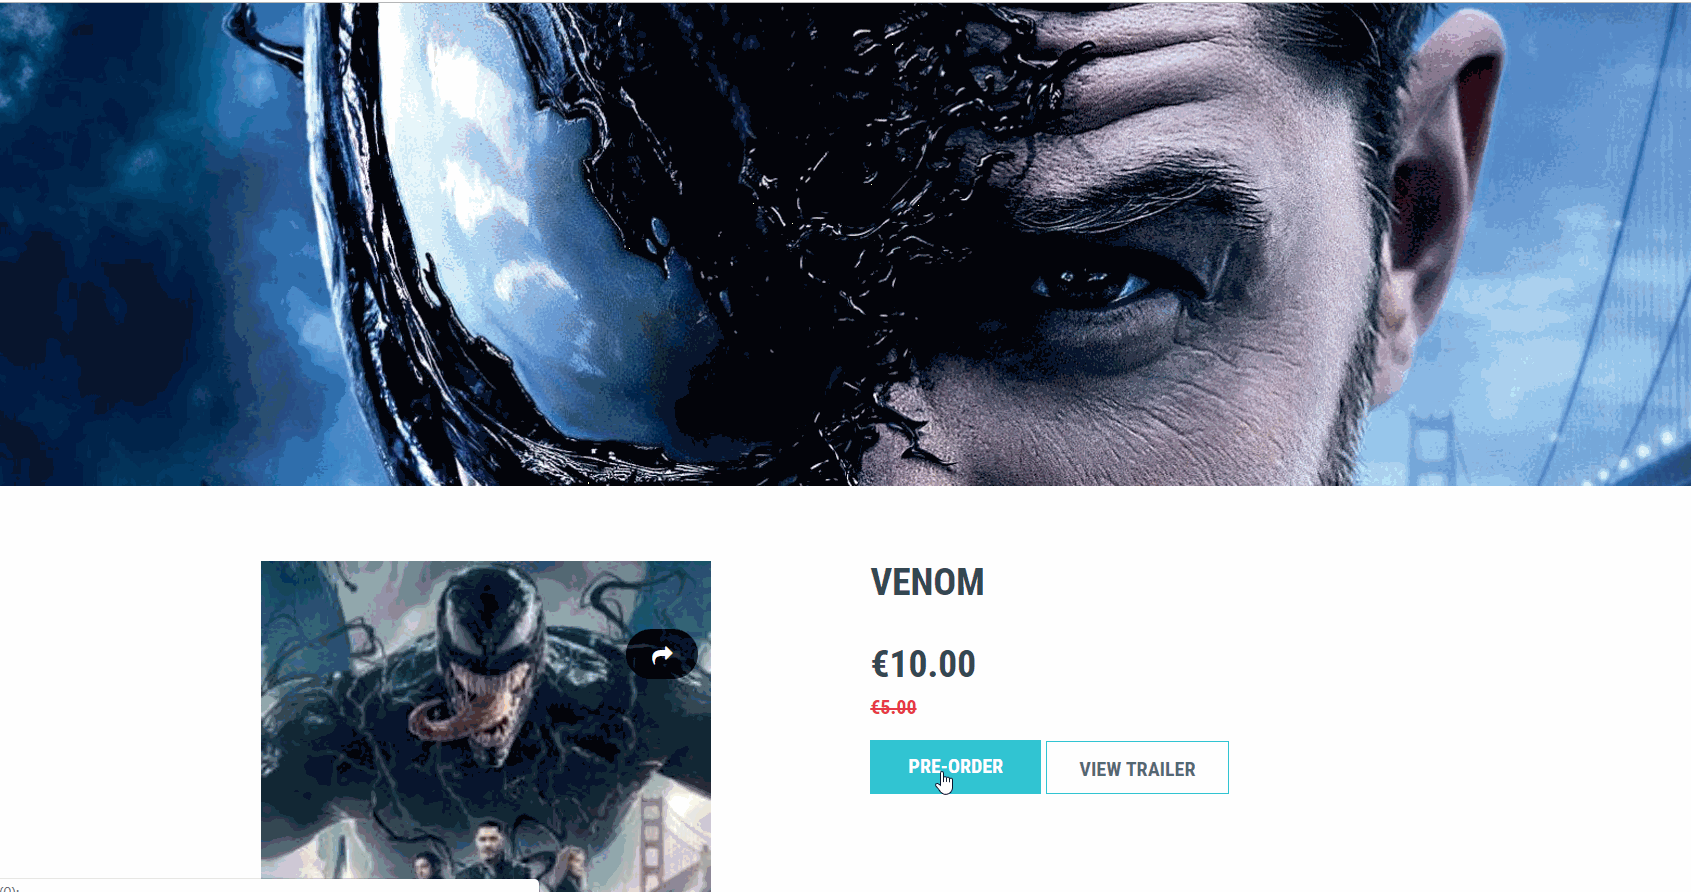
How a User Will Pre-Order Content
When a user clicks on the content in your website that is added in the Pre-Order category, he/she will see the "Pre-Order" option for the content. (See Below Screenshot)
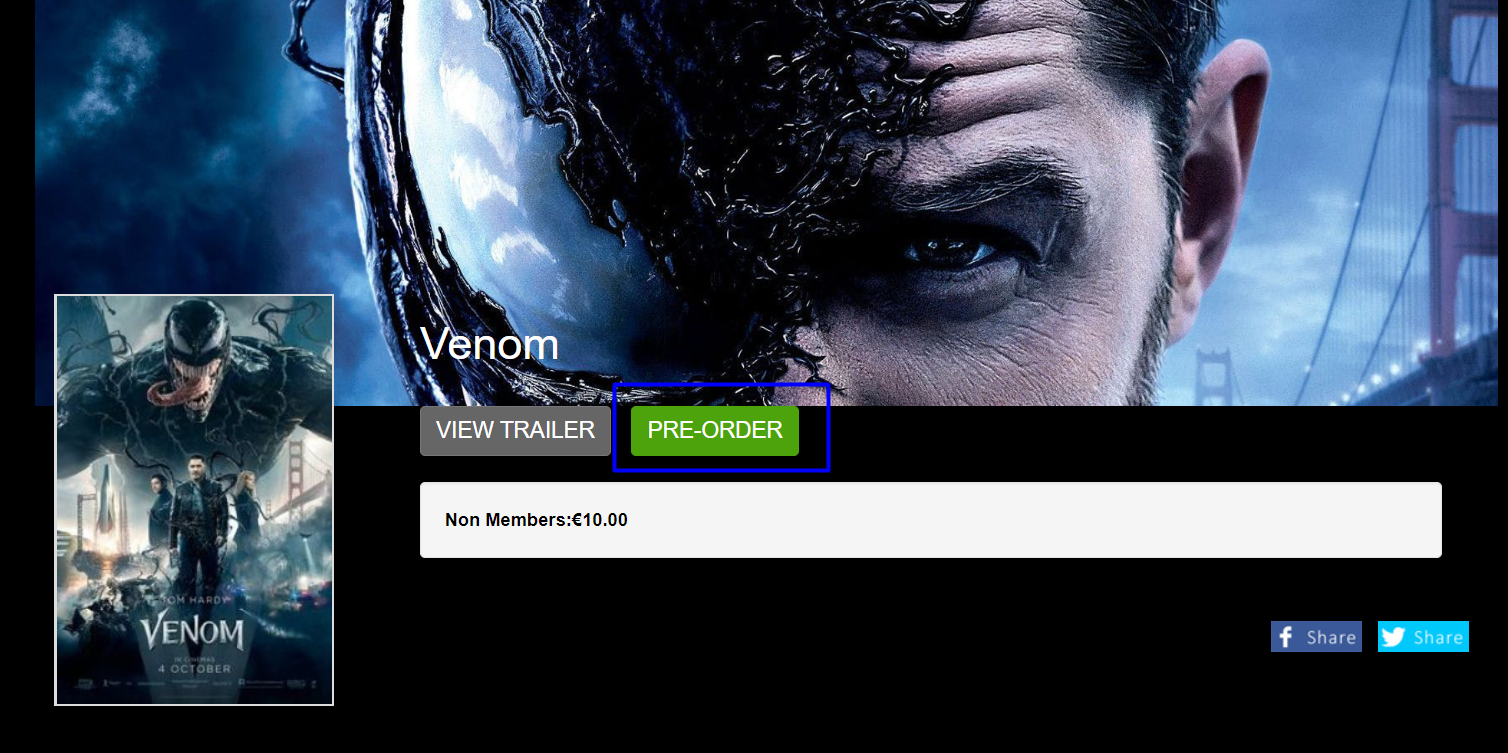
- When the user clicks on “Pre-Order” he/she will be asked to make the payment.
- He/she can pay through the Coupons (If available) or through his/her Credit Card.
- The user can see his/her Pre-Order purchase details in the Purchase History.
- When the content will be available for viewing, he/she will be notified about it via email.
Note: For free registered users, the subscription option will not be displayed (even though it is enabled for the store), when they click on the Pre-Order content. It only shows, Pre-Order and Voucher option in the payment popup.