How to Launch Your Audio Streaming Platform – A Quick Start Guide
How to Launch Your Audio Streaming Platform – A Quick Start Guide
Product: Muvi One (Classic)Adding Audio on Demand Content
View Audio Content in Content Library
Adding Content Categories To Website Menu
Introduction
Muvi provides a comprehensive end-to-end solution to launch your own audio streaming platform. You can launch your own white label audio streaming platform within a few minutes with zero capital expenditure, without any coding knowledge/IT team, and without a time-consuming process. Simply select the template, add content, upload audio, and map audio to content. Your audio streaming platform is ready to go live!!! Users can enjoy their favorite music/podcast anytime, anywhere by accessing your website/app. You can also add subscription plans for your audio streaming platform. By adding subscription plans you can collect money from your users for listening to music on your website/mobile app.
How to Enable Audio on Demand
You can select the Audio option at the time of signup. If you have not selected the option, then you can select it later from “Manage Content” --> “Settings” in the CMS.
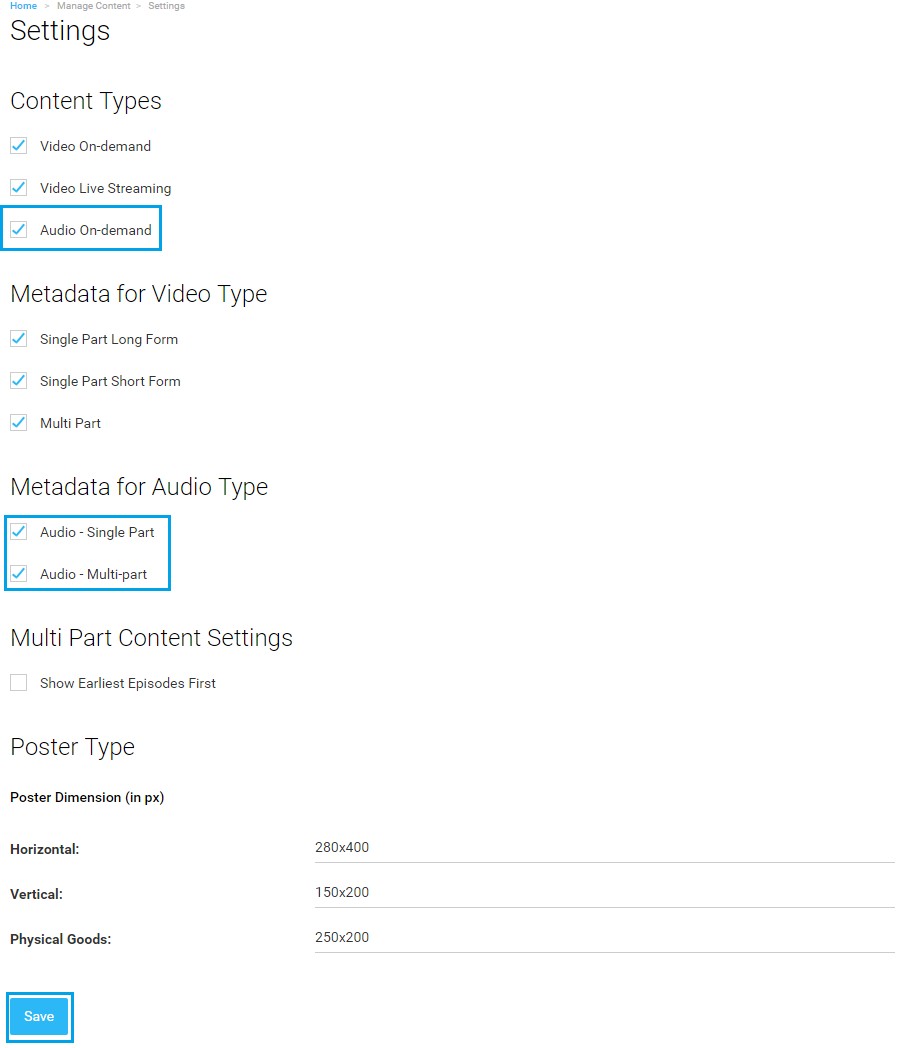
- Navigate to “Manage Content” -->“Settings” in the CMS.
- Under “Content Types”, select the check box for “Audio on Demand” (see below screenshot).
- Under “Metadata for Audio Type”, select the check box “Audio Single Part” if you want to add single audio files. If you want to add music or an audio album then you can select the option “Audio Multi-Part”.
- Click on “Save”.
Selecting Audio Only Template
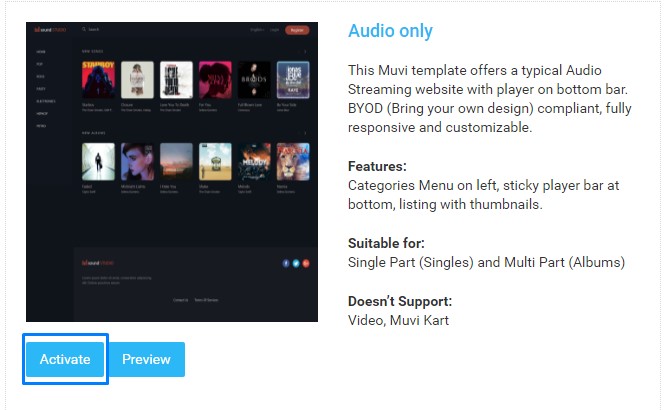
After you enabled Audio on Demand, you can see the “Audio Only” template in the “Manage Template” page (Go to “Website” -->”Templates” --> “Manage Template”). Click on “Activate” to activate the template for your Audio on Demand website. (See Below Screenshot)
Adding Audio on Demand Content
You can add content in the “Content Library” page of your CMS.
- To add content, go to “Manage Content” --> “Content Library” page in your CMS.
- Click on “Add Content”
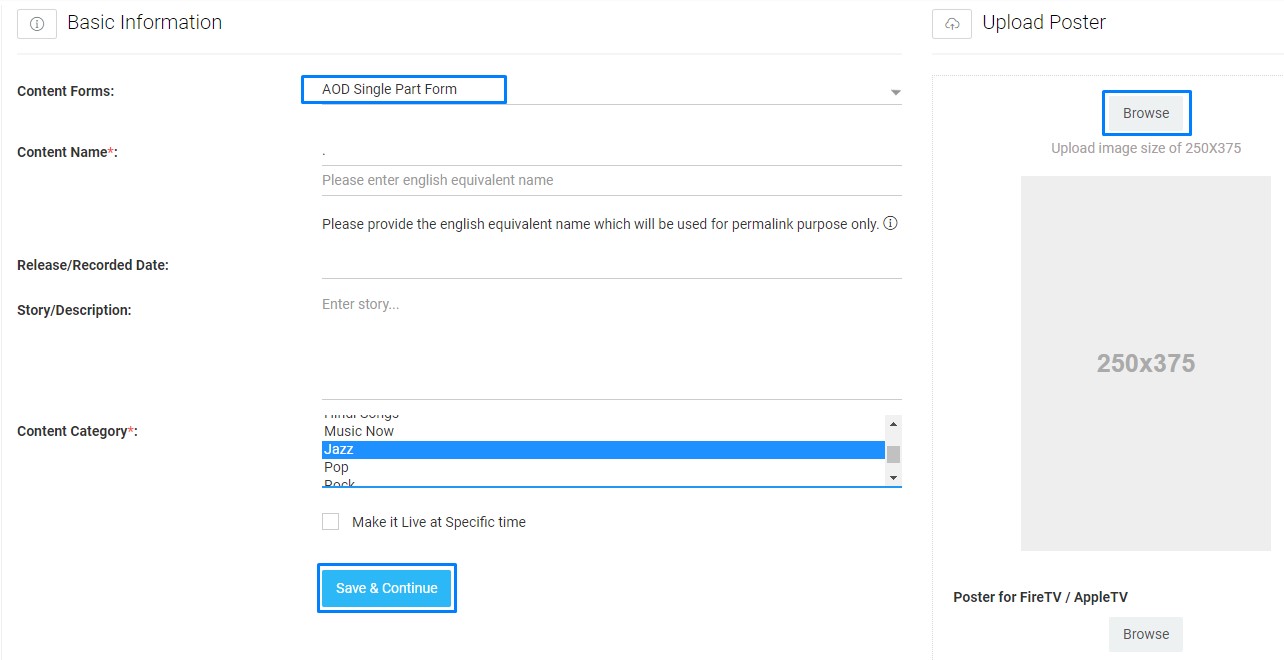
- In “Content Forms” field, select “AOD Single Part Form” from the drop-down list if you are adding a single audio file, select “AOD Multi-Part Parent, AOD Multi-Part Child” if you are adding a music/audio album.
- Type “Content Name” in the corresponding field
- Select the Record/Release date from the calendar
- Type a brief Story/Description about the content (Note: Description will be displayed in the "Modern" and "Revo" template. But, in the "Audio Only" template, description will not be displayed).
- Select the Content Category from the list (Select Jazz, Pop, Rock, Instrumental, etc.) Here you can select multiple categories for the same content. Please visit "Managing Content Category" help article page for the steps to edit or create a category.
- Add "Search Tags" in the corresponding field. (Search tags will help users find the content easily by typing the tags in the search bar. You can use words related to the content as search tags)
Note: First add "#" to enter search tags in the text field. Press "Enter" key or "," comma (e.g. #action, #horror). You can add a maximum of 5 search tags to content.
- Select the option "Publish Later" if you want your content to be live at a specific time (Please note you need to calculate your local time to the UTC time and set accordingly as we support UTC time zone only)
-
- Select the "Publish Start Date" and "Publish Start Time" to publish the content on a specific date and time. (You can select the current date and time or you can select the future date only)
- If you also select the option "Publish Audio Later", then the content will be published immediately and the audio will be published on the published date defined in ‘Publish Start Date and Time’ defined by you.
- Select the "Publish End Date" and "Publish End Time" if you want to hide the content from your store after a specific date and time. Your users will not be able to view/search the content after the specific date and time are over.
- You can also only set either the "Publish Start Time" or "Publish End Time". If you select only the "Publish Start Time" then the content will be published on the specific date and time and will remain in your store. If you select "Publish End Time" only, then the content will be published immediately but will be hidden from the users on the end date and time.
- Upload a poster by clicking on “Browse”.
- You can upload a Poster for TV Apps (This option will be available if you have already purchased any TV app). Click on browse and upload a poster. (Upload an image size of 800x600)
- Finally, click on “Save and Continue”
Note: If you have selected both the options Video on Demand and Audio on Demand and want to add only Audio on Demand content, then first you need to remove all the Video on Demand content.
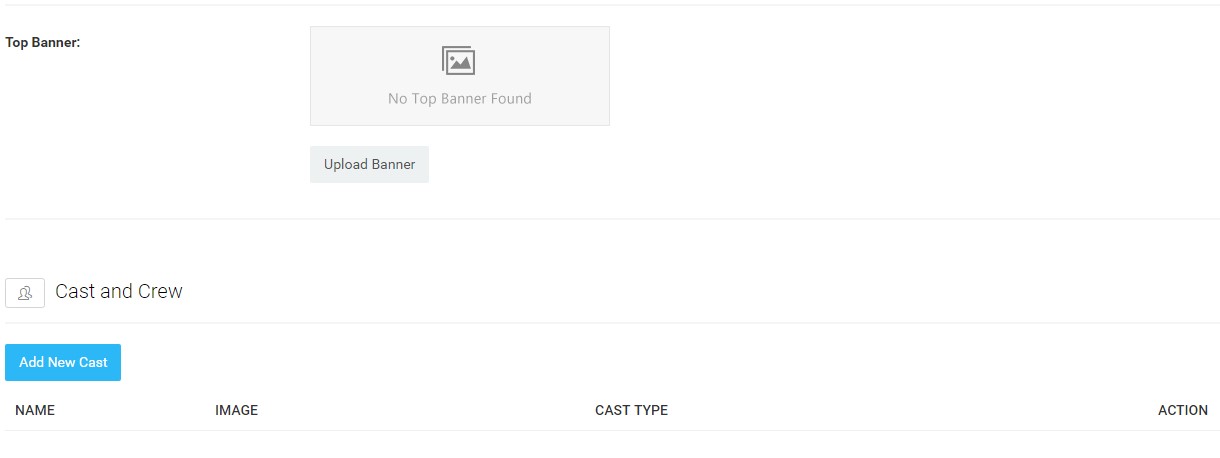
- Now you can see the option to upload “Top Banner” and “Add Cast and Crew”. (See Below Screenshot)
- To upload top banner, click on “Upload Banner”. You can select the image from your computer or form the image library.
- You can upload banner for "Website" (size 1200x350 px), "Mobile Apps" (size 1600x900 px) and "TV Apps" (size 1920x1080 px). You cannot edit the top banner size for mobile apps and TV apps. However, you can edit the top banner size for the website. Click here to know how to change the size of the top banner for website.
- To add “Cast and Crew”, click on “Add New Cast”. (You can add singer, music composer etc.)
View Audio Content in Content Library
After adding the audio content, you can view it in the "Content Library".
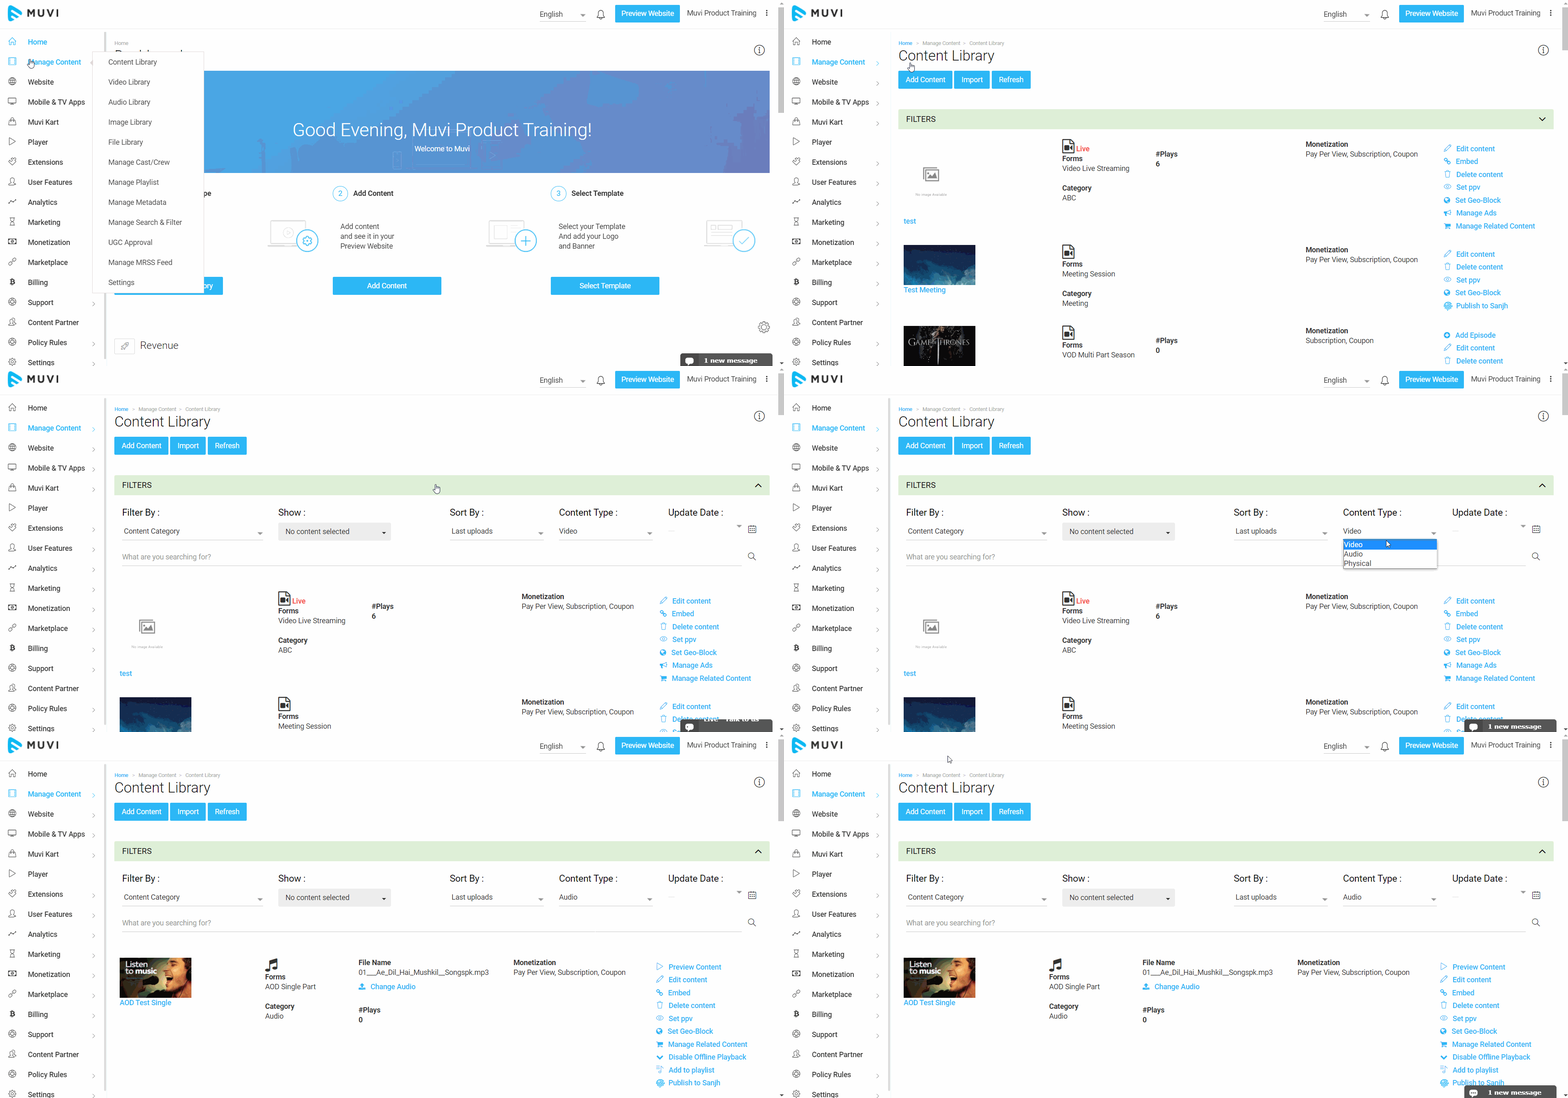
- To view the Audio Content, navigate to "Manage Content" -->"Content Library" in the CMS.
- Click on the "Filters" in the "Content Library".
- Under "Content-Type", select "Audio" from the drop-down. You can view all the audio content added by you.
Adding Content Categories To Website Menu
After adding the audio content, you need to add the content categories (Jazz, Pop, Rock, Instrumental etc.) to website menu. Once you added the content categories to website menu, it will be visible to your users when they visit your website.
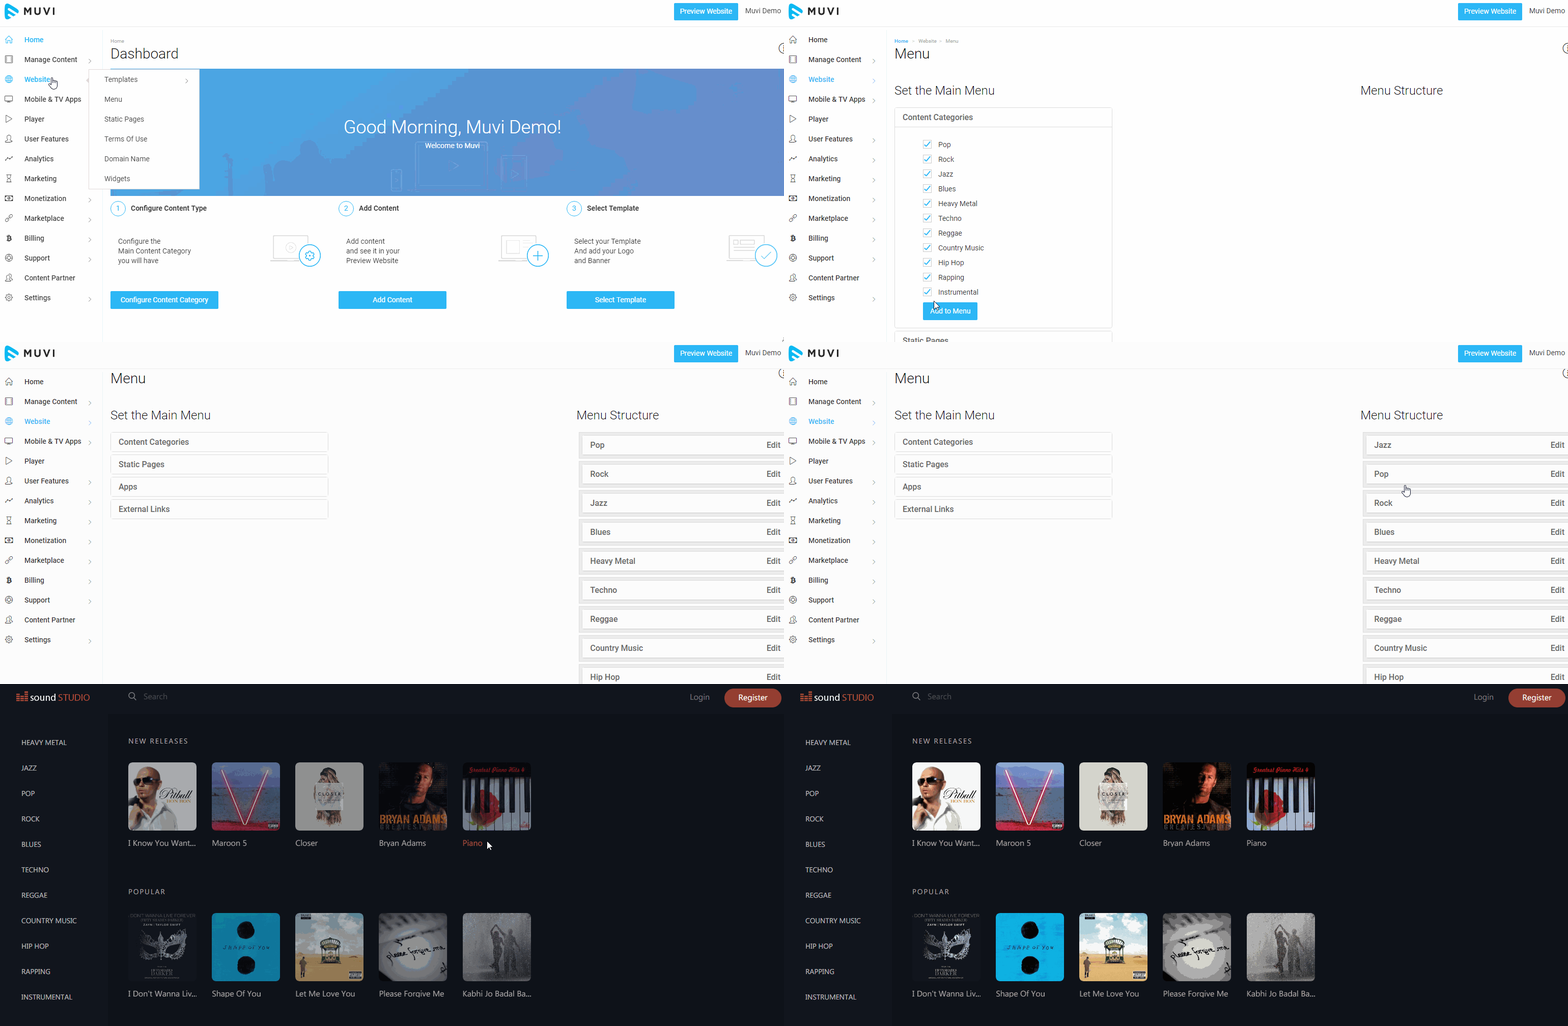
- To add content categories to website menu, go to "Website" --> "Menu" in your CMS.
- Under "Set the Main Menu" click on "Categories". You will see all your audio content categories
- Select the check box for the category that you want to add to your website menu
- Click on "Add to Menu"
The content categories will be added to your website menu. You can drag and drop to re-arrange the menu structure.
Uploading Audio Files
Currently, you can upload .mp3, .wma, .wav, .aac, .flac, .aiff, .m4p, .m4a, .m4b, .webm, .dvf and .raw audio files.
- To upload the audio files, go to “Manage Content” --> “Audio Library”.
- In the “Audio Library” page, click on “Upload Audio”.
- There are 5 methods available in Muvi CMS to upload your audio files to your store.
1.From Computer (Browser-Based Upload)
2.Server to Server Transfer
3.From Dropbox
4.Through FTP
5.Through S3 Sync (Share Audio Files From Amazon S3 Server)
To know more about how to upload audio files please Click Here.
Mapping Audio to Content
After uploading the audio file, you need to map it to the related content.
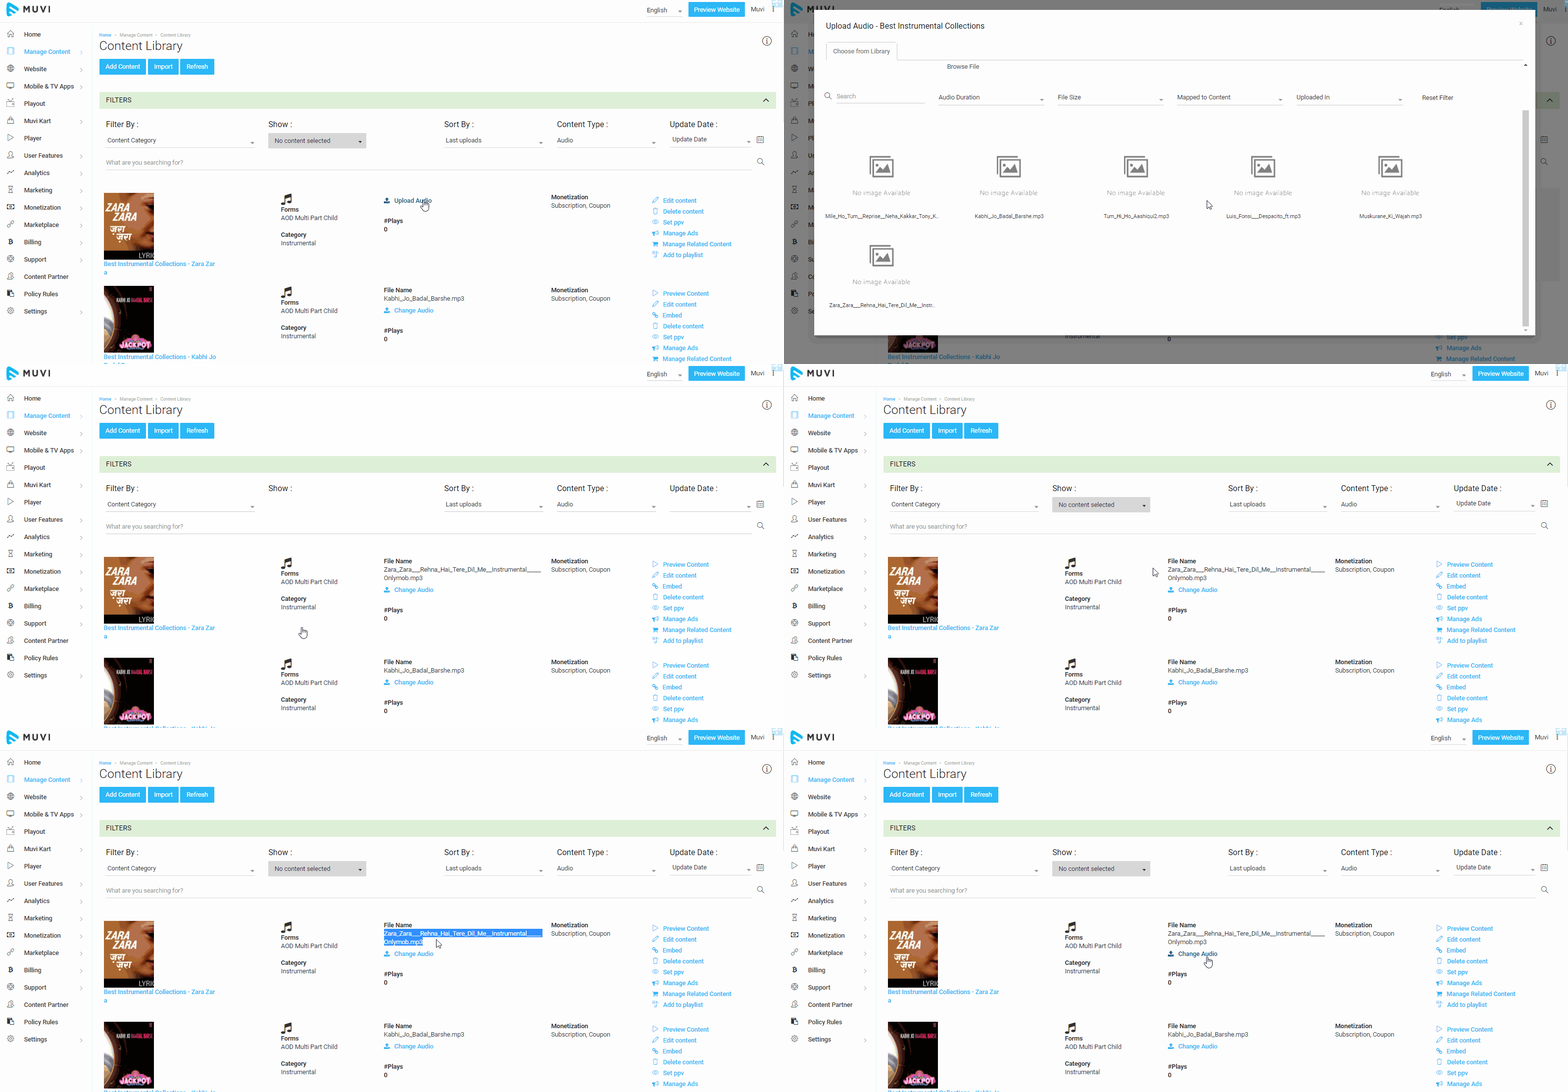
- To map audio file to content, go to “Manage Content” --> “Content Library”
- In the Content Library page, click on “Upload Audio” next to the content
- On next page, select the audio file you want to map to the content.
Once the audio file is mapped to the content, the status of the content will change from "Upload Audio" to "Change Audio".
How Users Can Play Audio
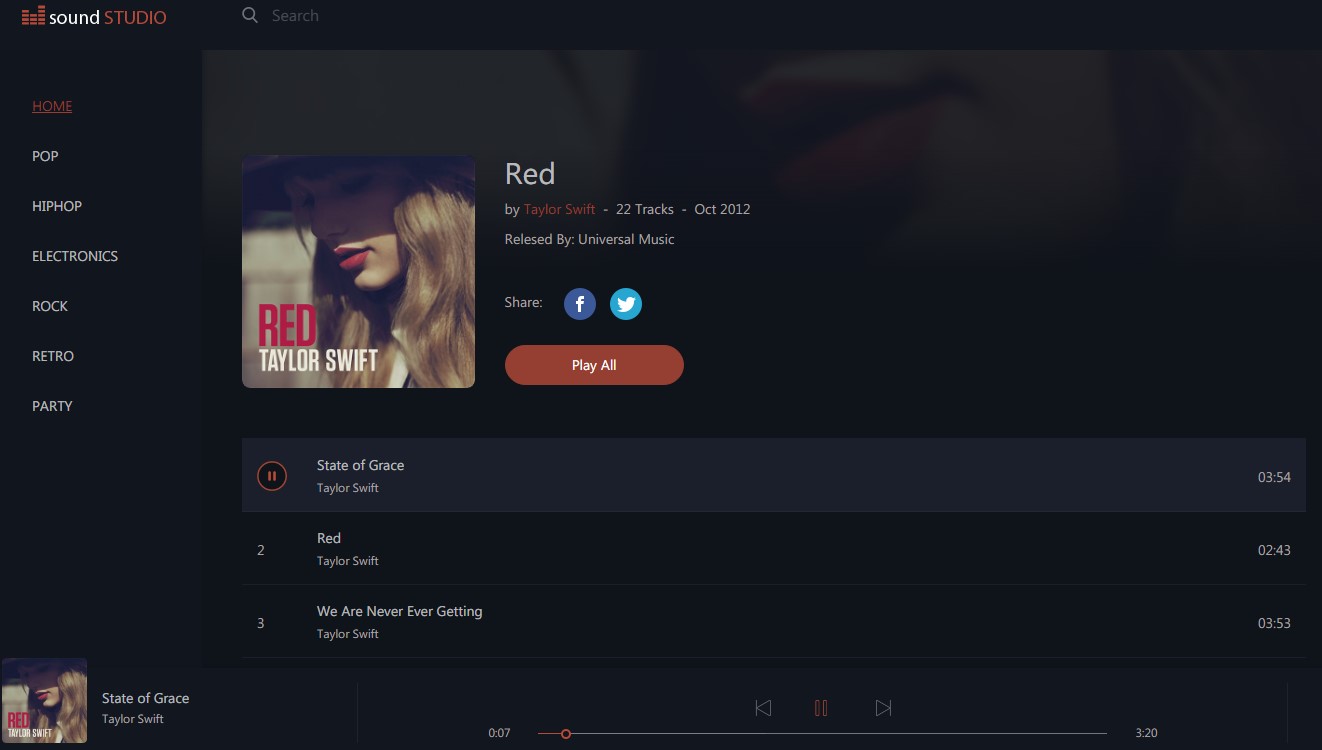
The audio is now mapped to the content. Your users can now click on the audio in your website and enjoy listening it anytime, anywhere they want.
Note: Currently, we do not have any option to close the Audio Player. You can only "Pause" the player. To close the player you need to refresh the page or switch the page.
Let us know so that we can improve.

February 24
12:00AM PST
Introducing TrueComply: Scaling Video Compliance with AI Automation
Video compliance has always been a critical requirement for broadcasters—and today, OTT platforms, streaming services, and enterprise video teams face the same challenge at a much larger scale.…...
Event Language: English

