How to Add Multi-Part Content – Content Partner
Product: Muvi One (Classic)How to Add Child Content (Episodes)
Introduction
As a Content Partner, you can add VOD Multi-Part content in the Content Partner Portal (if the admin has enabled this content option in the Muvi One CMS). Multi-Part content has 3 parts. 1. Parent 2. Season, 3. Child. For example, a TV Show is a multipart content type, where the Show is the Parent content, under the parent content you can add the seasons and the episodes are the Child content. First, you need to add 'Parent' content and then you can add the 'Seasons' and 'Child' content.
How to Add Parent Content
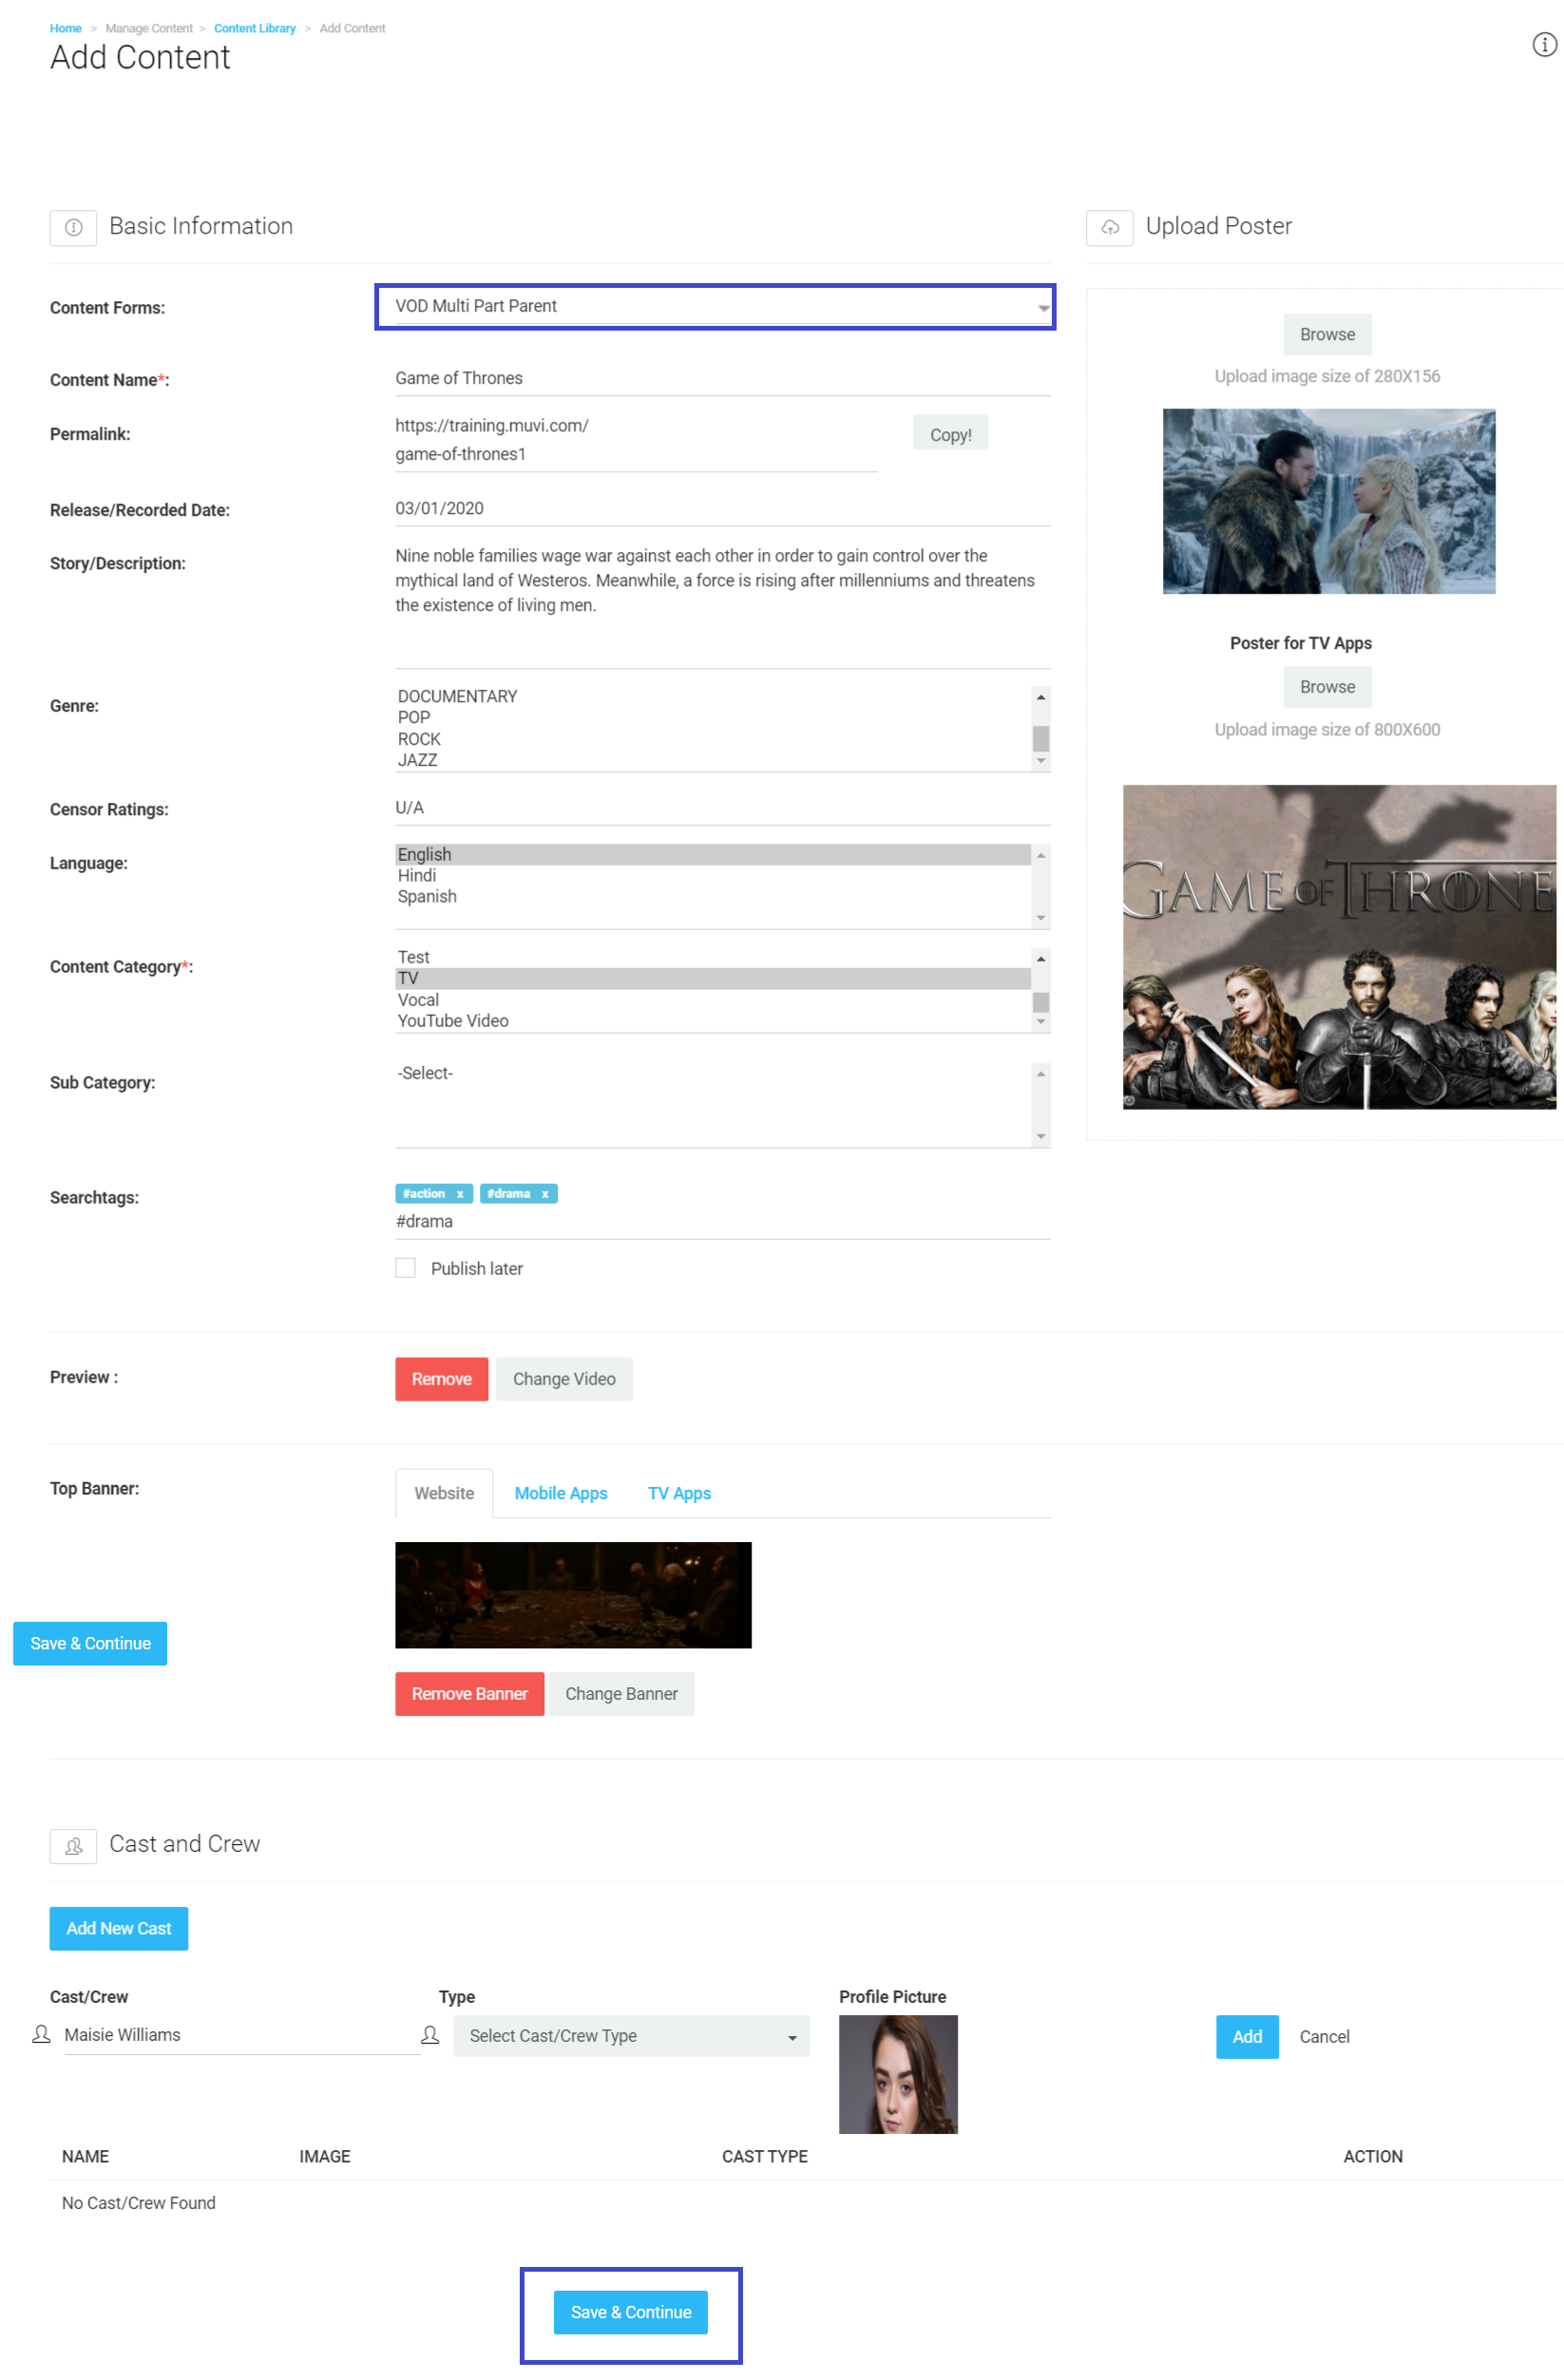
- Select VOD MultipartParent Form from the drop-down menu (see the below screenshot)
- In the Content Name field type the name of the show
- Select the Release/Record date of the show from the calendar
- Type the Genre of the particular show; for example, Action, Horror, Comedy, etc. (Note: When adding multiple Genres, please separate them with a comma or hit the Enter key on your keyboard)
- In the Story/Description field describe the show briefly.
- Select the Content Category from the drop-down list. (Such as TV Shows, Series, etc.) Here you can select multiple categories for the same content.
- Add "Search Tags" in the corresponding field. (Search tags will help users find the content easily by typing the tags in the search bar. You can use words related to the content as search tags)
Note: First add "#" to enter search tags in the text field. Press "Enter" key or "," comma (e.g. #action, #horror). You can add a maximum of 5 search tags to content.
- Select the option "Publish Later" if you want your content to be live at a specific time (Please note you need to calculate your local time to the UTC time and set it accordingly as we support UTC time zone only)
- Select the "Publish Start Date" and "Publish Start Time" to publish the content on a specific date and time. (You can select the current date and time or you can select the future date only)
- If you also select the option "Publish Video Later", then the content will be published immediately and the video will be published on the published date defined in ‘Publish Start Date and Time’ defined by you.
- Select the "Publish End Date" and "Publish End Time" if you want to hide the content from your store after a specific date and time. Your users will not be able to view/search the content after the specific date and time are over.
- You can also only set either the "Publish Start Time" or "Publish End Time". If you select only the "Publish Start Time" then the content will be published on the specific date and time and will remain in your store. If you select "Publish End Time" only, then the content will be published immediately but will be hidden from the users on the end date and time.
Note: The parent publish start date cannot be greater than the child publish start date and less than child publish end date.
- Under Upload, a Poster, click on the “Browse” button to upload a poster of the show in the mentioned size (See Below Screenshot).
- You can upload a poster for Mobile & TV apps(This option will be available if you have already purchased any mobile or TV app). Click on browse and upload a poster. (Upload an image size of 800x450)
(You can upload .jpeg, .gif, .png and .svg images. However, if you are uploading .svg images then you will not be able the crop the image and a few old browsers do not support this image format)
- Click on "Upload Preview" to upload a trailer or preview (please follow the above-mentioned steps mentioned for VOD Single Part content to upload the preview)
- Click on "Upload Top Banner" to upload a top banner (please follow the above-mentioned steps mentioned for VOD Single Part content to upload the top banner)
- Click on "Add New Cast" to add cast and crew for the content (please follow the above-mentioned steps mentioned for VOD Single Part content to add the cast and crew members)
- Click on "Save & Continue" to add the content (see the below screenshot)
How to Add Season
- To add the Season Page, navigate to “Manage Content” -->” Content Library” in the CMS.
- Click on “Add Content”.
- In the Content Formsfield, select the form “VOD Multi-Part Season” from the drop-down (for audio content, select AOD Multi-Part Season)
- Select the “Parent Name” from the drop-down for which you want to add the season.
- Type the “Season Name”.
- The “Permalink” will be automatically generated for the season page.
- Add the “Story” for the season.
- Add “Search Tags” for the season. You can add a maximum of 5 search tags followed by #. Hit the “Enter” key to add search tags.
- Upload the Poster for the season.
- Click on “Save”. The metadata for the season will be saved.
- You can upload the preview or trailer for the season. Click on “Upload Preview” to upload the preview.
- Click on “Upload Banner” to upload the Top Banner for the season.
- You can also add cast & crew for the season. To add the cast and crew, click on “Add New Cast”.
How to Add Child Content (Episodes)
- Select VOD Multipart Child Form from the drop-down menu (See below Screenshot)
- In the Content Name field select the Parent Content name from the drop-down menu
- Select Season Number from the drop-down menu.
- Enter the Episode Number in the corresponding field.
- In the Title field, type the episode title.
- In the Story, Description field describe the episode briefly.
- In the Episode Date field, type the date on which the particular episode will be telecast.
- Add "Search Tags" in the corresponding field. (Search tags will help users find the content easily by typing the tags in the search bar. You can use words related to the content as search tags)
Note: First add "#" to enter search tags in the text field. Press "Enter" key or "," comma (e.g., #action, #horror). You can add a maximum of 5 search tags to content.
- Select the option "Publish Later" if you want your content to be live at a specific time (Please note you need to calculate your local time to the UTC time and set it accordingly as we support UTC time zone only)
-
- Select the "Publish Start Date" and "Publish Start Time" to publish the content on a specific date and time. (You can select the current date and time, or you can select the future date only)
- If you also select the option "Publish Video Later", then the content will be published immediately, and the video will be published on the published date defined in ‘Publish Start Date and Time’ defined by you.
- Select the "Publish End Date" and "Publish End Time" if you want to hide the content from your store after a specific date and time. Your users will not be able to view/search the content after the specific date and time are over.
- You can also only set either the "Publish Start Time" or "Publish End Time". If you select only the "Publish Start Time" then the content will be published on the specific date and time and will remain in your store. If you select "Publish End Time" only, then the content will be published immediately but will be hidden from the users on the end date and time.
- You can enable the "Treat Content as Live Stream" option if you want to make VOD content like live streaming content. For more information please clickhere.
- Under Upload, a Poster, click on the “Browse” button to upload a poster of the episode in the mentioned size.
- You can upload a poster for Mobile & TV apps(This option will be available if you have already purchased any mobile or TV app). Click on browse and upload a poster. (Upload an image size of 800x450).
- Then click "Save " to finish.