Create Online Radio Channels Using Muvi Playout
Product: PlayoutAdding Audio Content to Playout
Scheduling Audio Content in the Scheduler
Embed Muvi Playout Channels to Website
Generate HLS URL to Share Playout Channels
Introduction
You can create your online radio channels using the Muvi Playout. Create multiple channels and add songs, and audio files in different time slots in different channels. The audio content added to the Playout will be played automatically in different channels at different times just like the Internet Radio Station. You can add the channel(s) using the Embed link and/or API to your website, mobile app (iOS, Android), and/or TV app.
Signup with Muvi Playout
- To sign up with the Muvi Playout, please click here.
- Click on “Free Trial” to take a 14-day free trial.
- Provide the details, your “Name”, “Company Name”, “Phone Number”, “Email” and “Password”. (The password field must be between 8 to 30 characters in length with at least 1 number, 1 uppercase, 1 lowercase, and 1 special character. For example, Muvi@2023 or Test123*, etc.)
- Click on “I agree to Muvi's Terms & Privacy Policy” and then click on “Next”.
- You will be asked to type an OTP for verification.
- Check your email (that you provided to sign up) for the OTP.
- Copy the OTP from the email and paste it on the verification window and click on "Validate OTP". Your free trial account will be created.

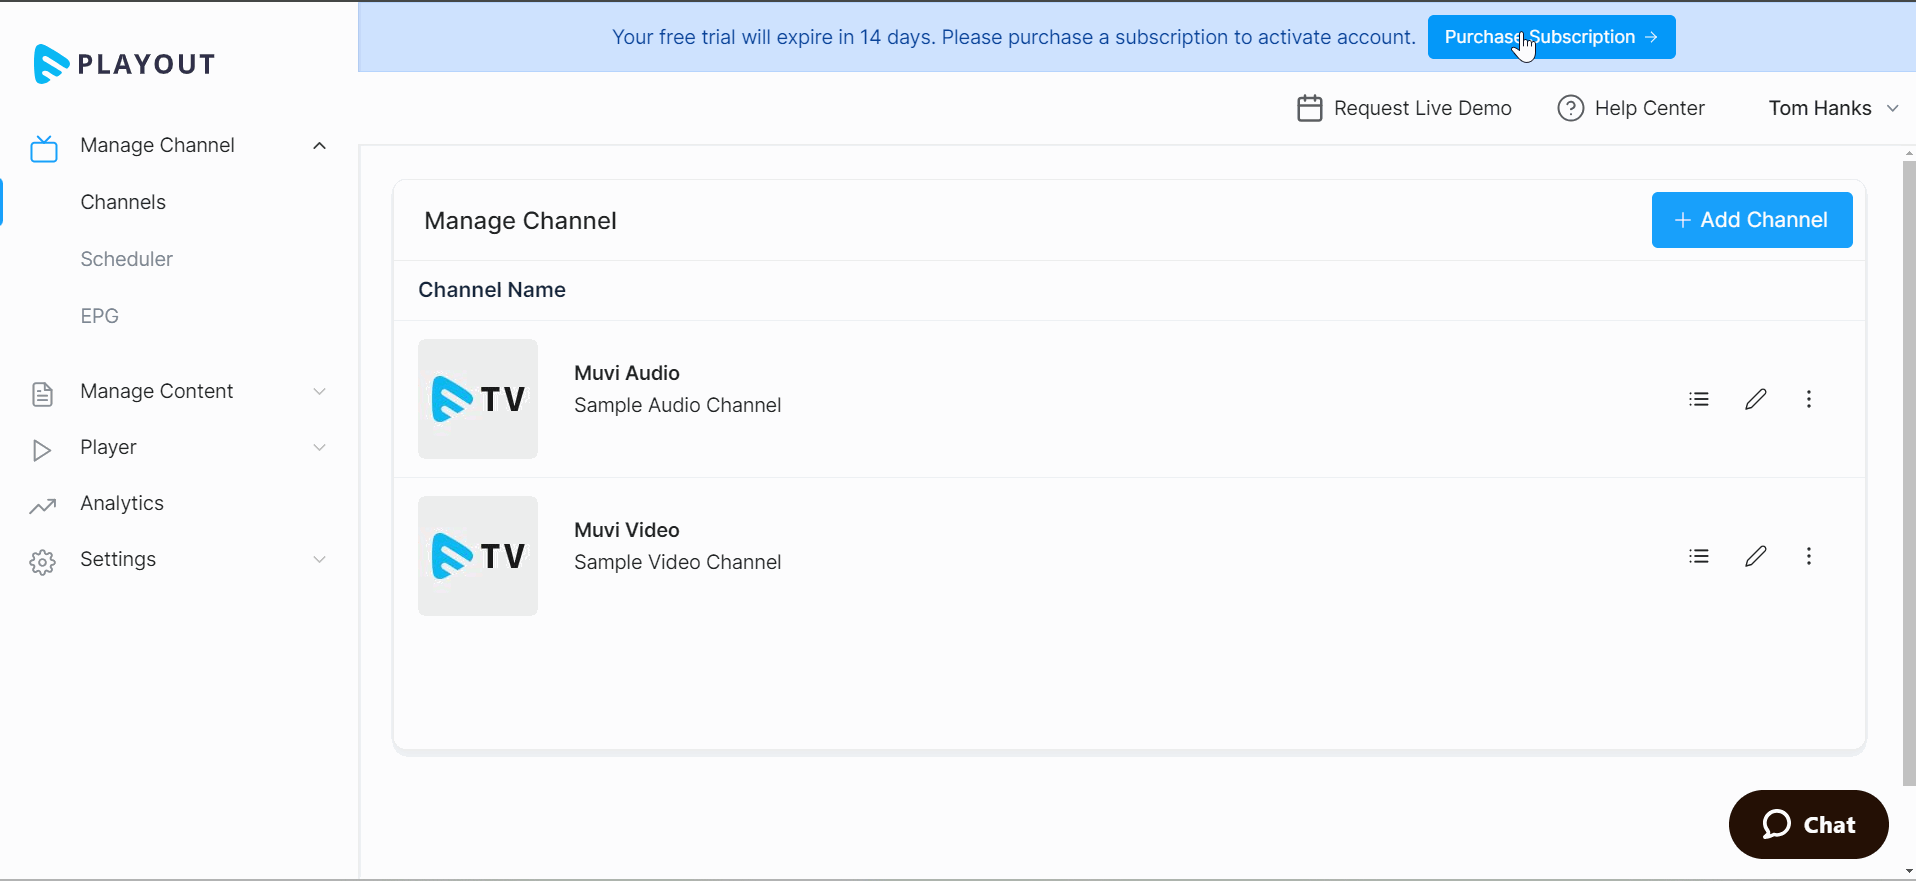
Purchasing the Subscription
Once your 14-day free trial is over, you will be prompted to purchase the subscription to Muvi Playout. You can also purchase the subscription before your free trial ends.
- Click on “Purchase Subscription” on the top right corner of your page or navigate to "Profile"-->"My Account" and click on the "Purchase Subscription" tab.
- Select a "Package" (i.e., "Standard", "Professional" or "Enterprise".)
- Select a subscription period (i.e., "Monthly", "Half Yearly" or "Annually").
- Click on “Proceed to Checkout”
- Provide the details of your Credit Card details and Billing Address.
- Click on “Pay Now”.
- Click on "Recept" under "Payment History" to view and download the purchase invoice.
- Click on “Subscription Details” to view your Playout subscription details.
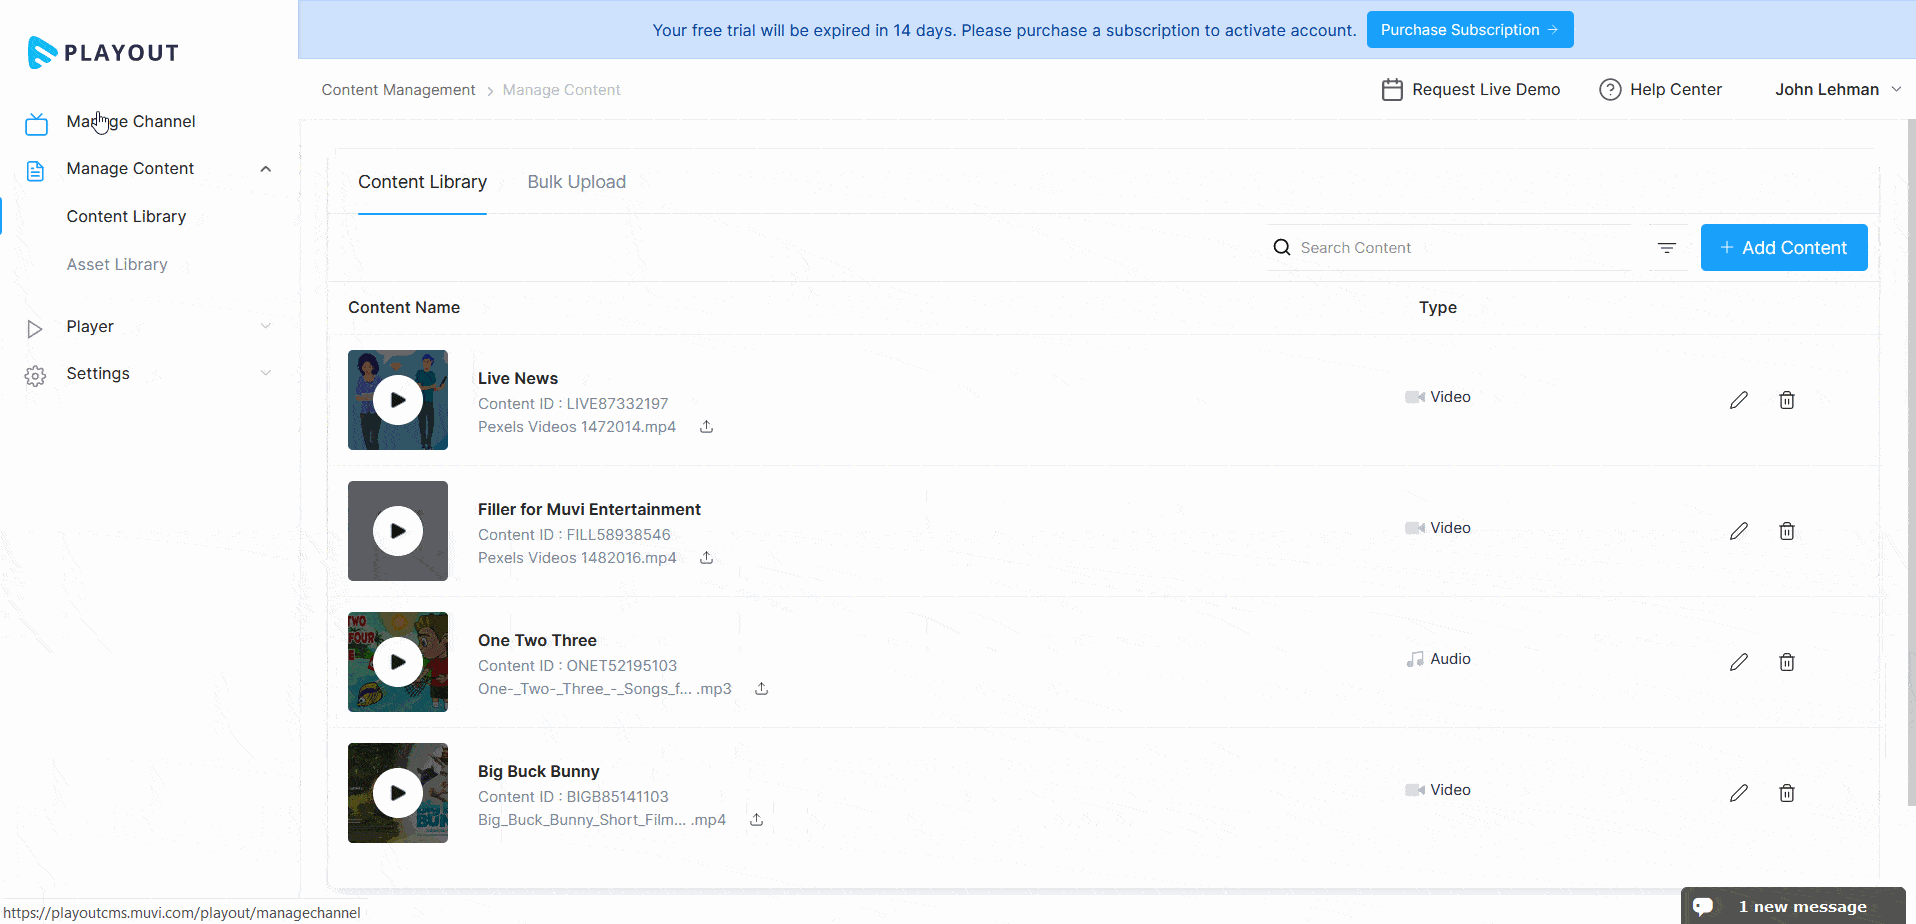
Adding Audio Content to Playout
First, you need to add content in Playout. After creating the content, you need to add it to a channel in a specific time slot. Create multiple contents to add in different channels in different time slots.
- To add content, navigate to “Manage Content” -->"Content Library" in the CMS.
- In the “Content Library”, click on “Add Content”.
- From the “Content-Type” field, select “Audio” from the drop-down.
- Type the “Content Name”.
- Type “Story/Description” of the content.
- Type “Search Tags” for the content. The search tags will help search the content easily. After typing the search tags, you need to type a “,” (comma).
- Upload a poster for "Web”.
- Click on “Add File”.
- Then click on the "Folder Icon" to upload an image file for the content from your device. You can also add an image file from the "Asset Library" (if you have already uploaded the image file to the Asset Library).
- Under “Media”, click on "Add File" for “Primary Media”.
- Then click on the "Folder Icon" to upload an audio file for the content from your device. You can also add an audio file from the "Asset Library" (if you have already uploaded the audio file to the Asset Library).
- Click on “Save” to save the content. The encoding will be started. Once the encoding is finished, the content can be scheduled to a channel.
- To preview the content, click on the “Preview” button on the the content.
- Repeat the process to add multiple audio contents.

How to Add an Audio Channel
You need to create an Audio Channel(s) in the Playout. After creating the channel, you can add audio content to the channels in different time slots.
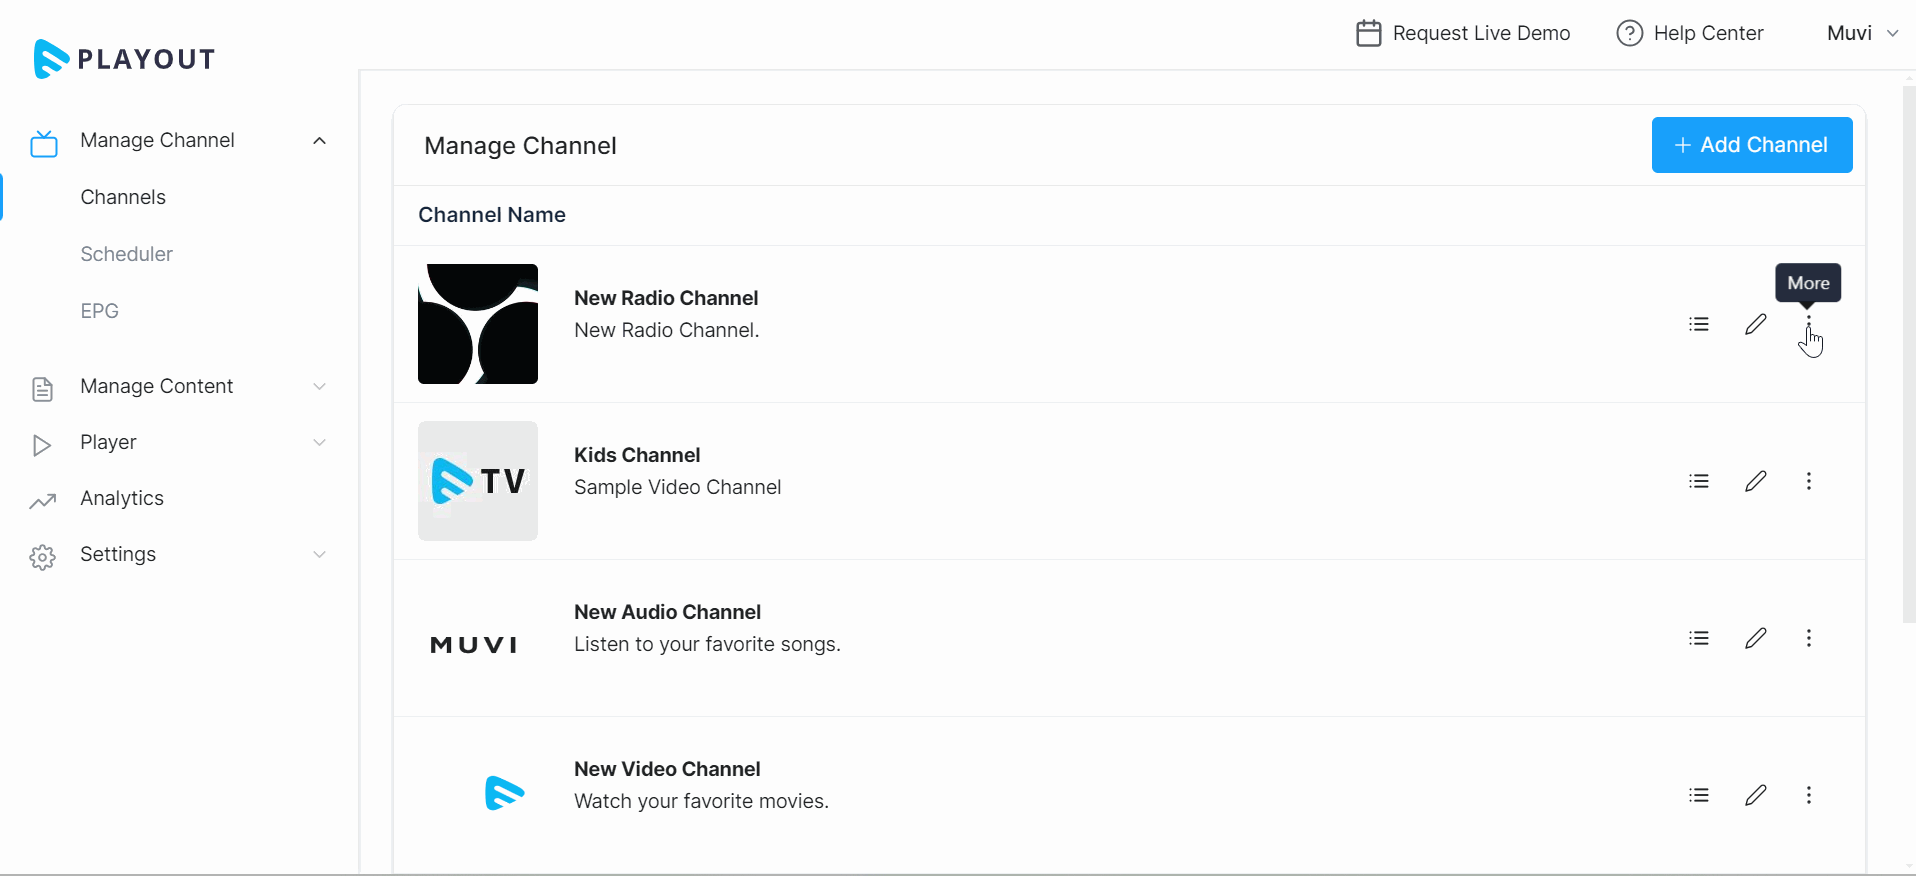
- To create an Audio Channel, navigate to “Manage Channel”-->"Channels" in the CMS.
- Click on “Add Channel”.
- Select the "Channel Type"(i.e., Audio).
- Type the “Channel Name”.
- Type channel “Description”.
- Under "Media", click on "Add File" to upload a "Filler Media". Filler media will be played when there is no program added at that time. You can also add a gap between two programs by adding a filler media.
- Click on the "Channel Logo" tab. Then, click on “Add File” to upload the Channel Logo from the Asset Library or your device.
- Click on the "Channel Image" tab. Then click on “Add File” to upload the Channel Image from the Asset Library or your device.
- Click on “Save Channel”. The channel will be added.
- You can preview the channel by clicking on the 3 dots and then clicking on "Preview".
- You can repeat the process to create multiple audio channels,
- To edit a channel, click on the "Edit" icon make necessary changes if required, and then click on "Update".
- To delete a channel, click on the 3 dots on the right-hand side of a channel and click on "Delete". When asked for confirmation, click on "Proceed" to delete the channel.

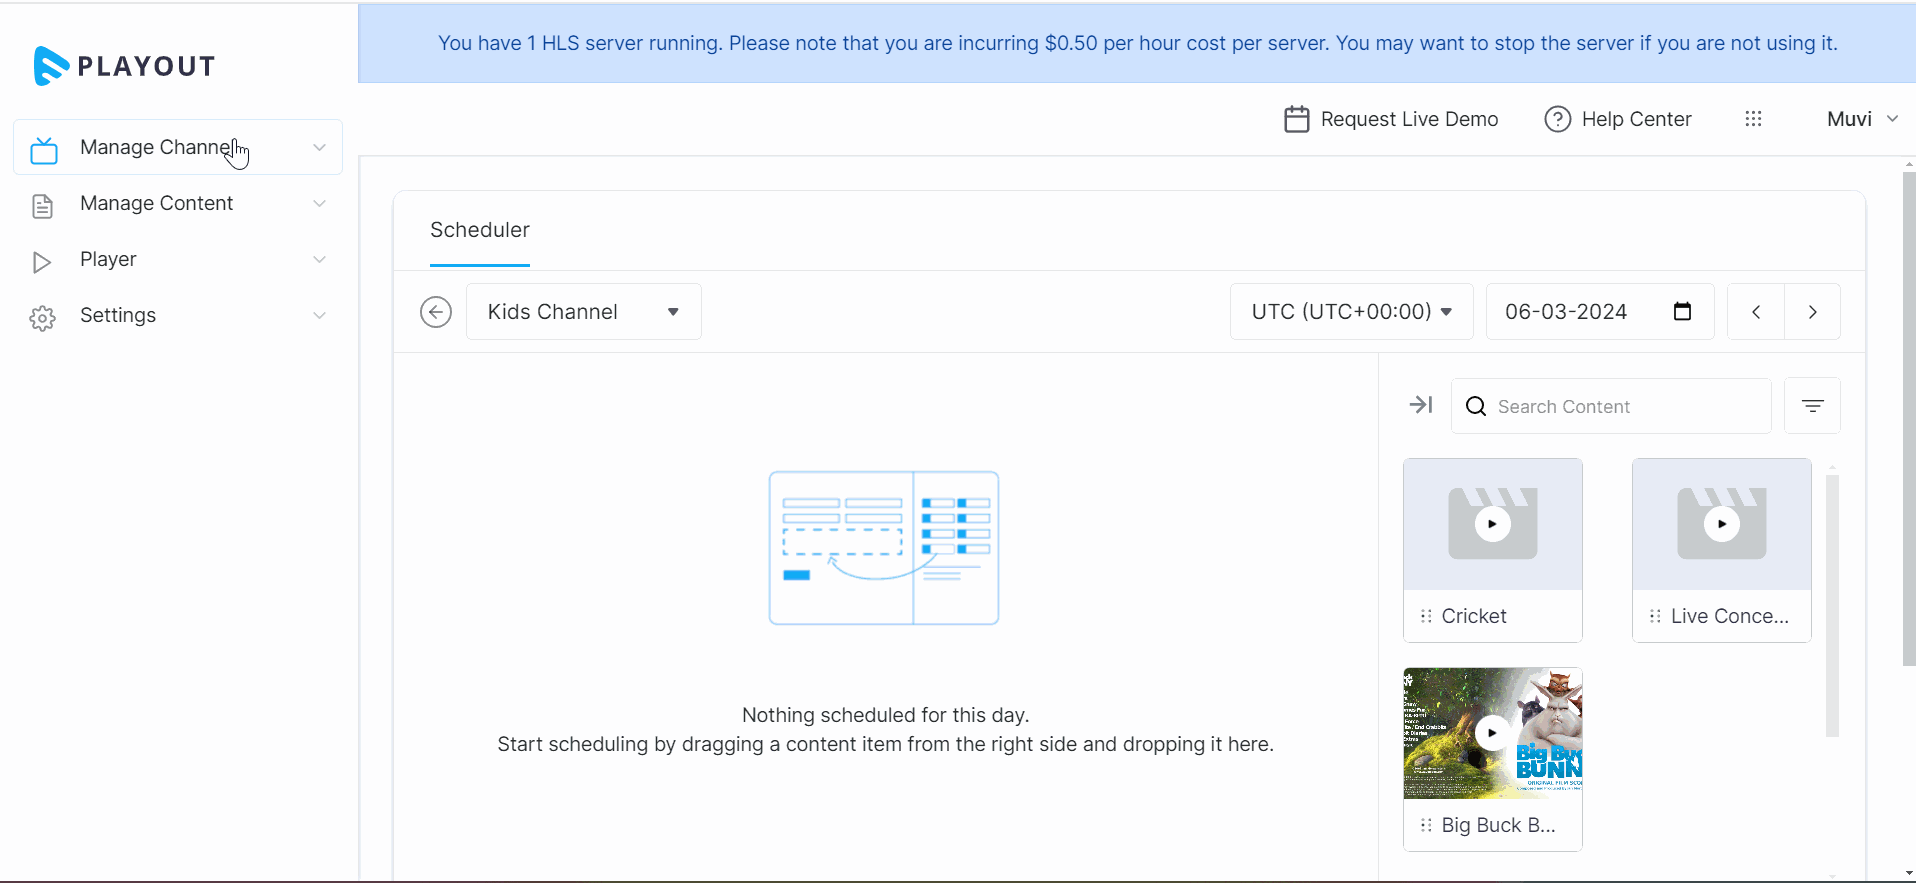
Scheduling Audio Content in the Scheduler
You can add content to the channels and schedule them in different time slots through the “Scheduler”. You can also select time zones for a specific region through the scheduler.
- To add content to the scheduler, click on the “Manage Scheduler” icon on the right side of an audio channel.
- Select the Time Zone from the drop-down. e.g. if you want to show your programs to your Indian users, then select “Asia/Kolkata (UTC +05:30)”.
- To add content on a specific date and time slot, click on the scheduler. You can select the date and time manually by clicking on the "Calendar". You can either add the content on the current date or on the future date. You can not add content in the past date.
- If no date is selected, then content will be added to the current date and time.
- On the right-hand side, you can see the audio content that you have already added to the "Content Library".
- Drag and drop the audio content to the scheduler.
- Type the audio content name in the “Search Content” field to search and add the content or you can even use the filter option.
- Automatically the time difference between the content is set to 1 millisecond.
- You can even add a custom time gap between the content (to Milisecond).
- Click on the 3 dots on the right-hand side of the content to select the time gap.
- Click on "Add Gap Above" to set a time duration gap above the content. You can set the gap in HH:MM: SS format. For example, to set a 5-second gap, type 00:00:05.
- Click on "Add Gap Below" to set a time duration gap below the content. You can set the gap in HH:MM: SS format. For example, to set a 5-second gap, type 00:00:05.
- You can also add a "Filler Media" in between the two programs. When there is no program available., the end-users can watch the filler media.
- You can delete a specific event by clicking on the "Trash Icon" on the right-hand side of an event. When asked for confirmation, click on "Proceed" to delete the event.
- You can select "Repeat" if you want to repeat a specific program on a Daily, Weekly, or Monthly basis.
- Select the date from the calendar on which date the repetition will end.
- Click on the "Edit Icon" on the right-hand side of an event to set a specific "Start Time" and "End Time" manually in milliseconds.
- Schedule as much content on different dates and time slots. You schedule content for the next day, next week, or next month.
Embed Muvi Playout Channels to Website
- To get the "Embed Link", first, you need to generate the HLS for the channel.
- To generate an HLS URL, click "Manage Channel" in the Playout CMS.
- On the right-hand side of the channel, click on the 3 dots (more).
- Then, click on "Generate HLS".
- Wait for a couple of minutes. The HLS URL will be generated.
- On the right-hand side of the channel, click on the 3 dots (more).
- Click on “Embed Channel”.
- Click on "Copy" to copy the embed link and add it to your website. When your end-users visit the page, they can view the programs on the channel. If you are an existing Muvi customer, then you can embed the link to a static page of your Muvi Store.
| Note: You can also add the Playout channel(s) to your mobile app, or TV app using the Embed link/HLS URL/API. |
Generate HLS URL to Share Playout Channels
You can generate an HLS URL for your 24x7 Playout channels and use it in any player - be it a Muvi player or any 3rd party player to display your channel and the scheduled content in the channel to the end users.
- To generate an HLS URL, click on "Manage Channel".
- Click on the 3 dots on the right-hand side of a channel.
- Click on "Generate HLS".
- Wait for a couple of minutes. The HLS URL will be generated.
- Click on "Copy" to copy the HLS URL. You can share it on your website/app.
Note:
|
How to Stop HLS for a Channel
You can stop the HLS URLs for the channels that you are not streaming. This will help you save the Streaming Hours costs.
- To stop the HLS for any channel, click on the 3 dots on the right-hand side of a channel.
- Then click on ‘Stop HLS’. When asked for confirmation, click on "Proceed" to stop the HLS.
- You will get a notification on the screen that the HLS is stopped.
- Admin will get a notification every 24 hours(via email) and an always-ON notification in the CMS notifying how many HLS are active.

Sharing Playout via API
You can integrate your existing front-end (website/App) via API.
- To get the API details, navigate to "Admin" -->"Advanced" in the CMS.
- Under the "Advanced Settings", you can get the App ID and App Secret.